This Palia Secret Depths Quest Information has a full Temple of the Roots Walkthrough and can assist you to resolve its sliding tile puzzle!
Bahari Bay has loads of secrets and techniques to uncover in Palia. Apart from a bunch of cool fish and priceless ore, it’s also possible to discover two temples: the Temple of the Gales and the Temple of the Roots. On this information, we’ll let you know easy methods to unlock the Temple of the Roots and easy methods to full it.
The right way to Unlock the Palia Secret Depths Quest
You possibly can unlock the Palia Secret Depths Quest by finishing quests “Keeper of Waves,” “Keeper of Gales,” and “Keeper of Flames.” This trio of Quests shall be unlocked after you end the Temple of the Gales.
Palia Secret Depths Quest Walkthrough | Temple of the Roots Walkthrough
As soon as you’ve got accomplished the Quests “Keeper of Waves,” “Keeper of Gales,” and “Keeper of Flames,” you may get an extra brief Quest known as “Keeper of Roots” which is just a brief dialog with Einar. As soon as you’ve got talked to him, he’ll let you know to satisfy him and Hekla on the Temple of Roots in Bahari Bay.
The one device you may want for this journey is the Pickaxe; although you will not be doing any mining throughout the Temple of the Roots, you will want it to interrupt via sealed partitions. Make certain it is totally repaired!
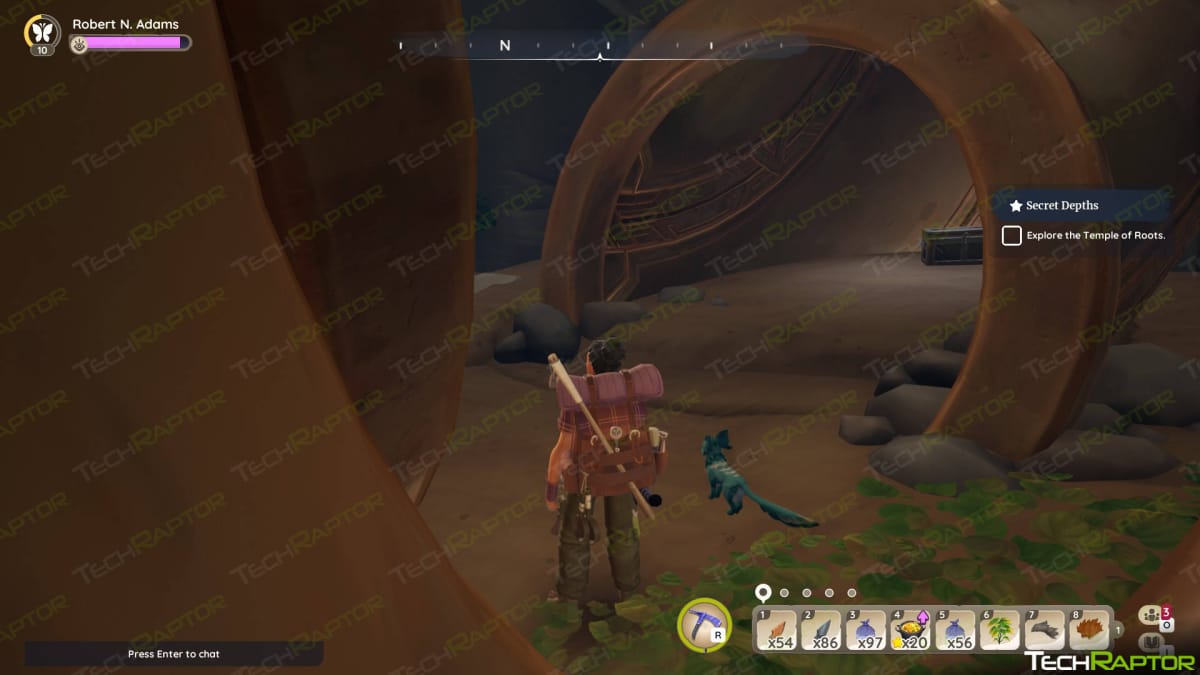
Getting into the Temple
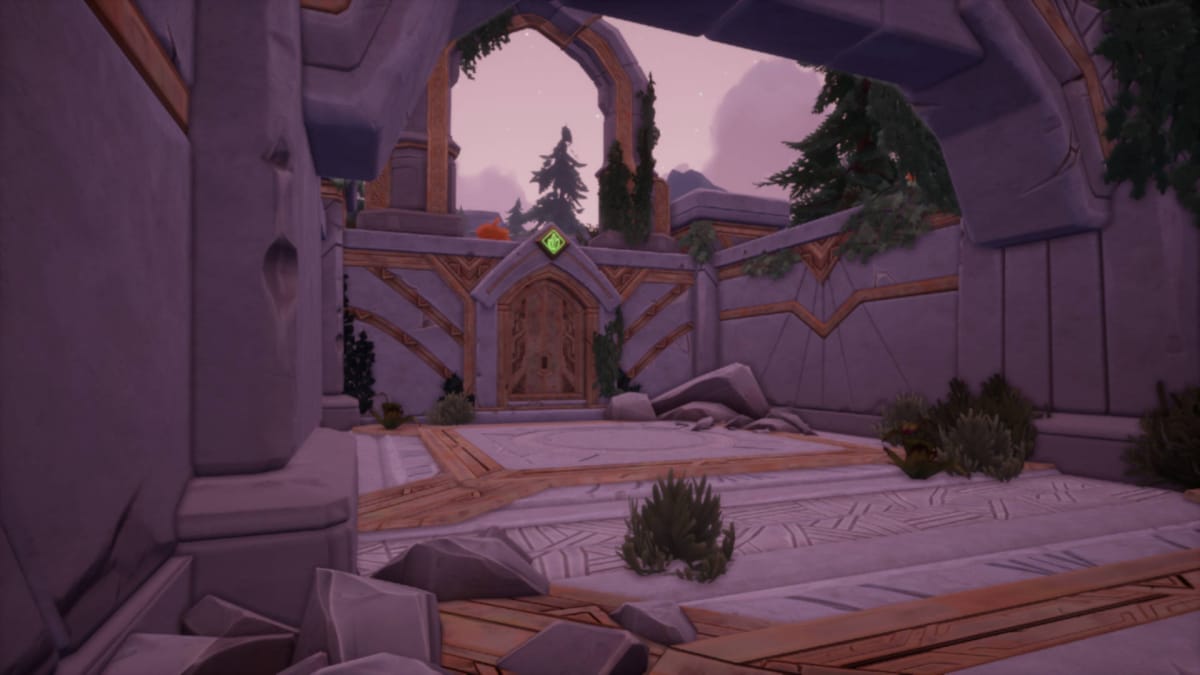
First, let’s enter the Temple. Luckily, there are not any advanced puzzles to resolve right here — all it’s important to do is discuss to Hekla (and, if desired, Einar). Subsequent, use your pickaxe to interrupt via the damaged wall and you will be within the first room of the Temple.
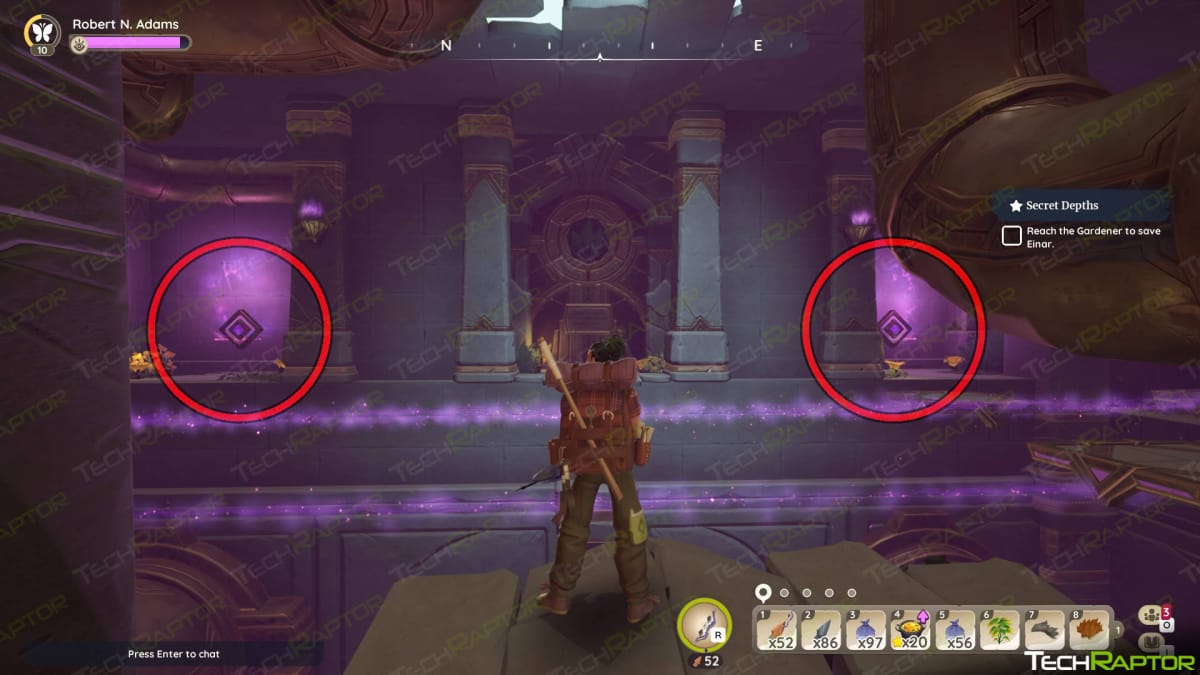
The Massive Corridor and the Flowstone Gate Hub
The primary room of the Temple of the Roots is totally huge — and it is also full of treasure. All you might want to do to progress is attain the underside of the room through the use of your glider, however taking a cautious route can get you some free stuff with out a lot further work.
First, look down and to the west and you may see an enormous pipe. The primary Historic Chest is positioned on this pipe as proven within the picture under.
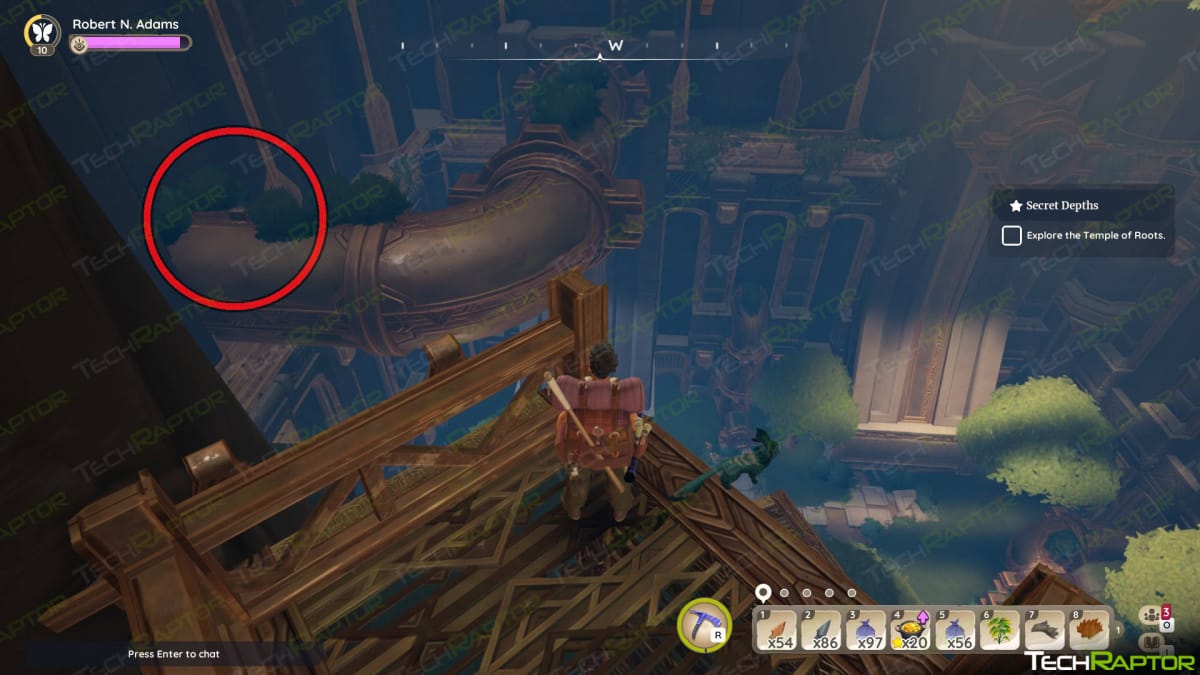
Glide all the way down to this pipe. Should you fall, there’s a ladder that means that you can climb all the best way again as much as the highest.
When you’re on the pipe, stand on the elbow nook piece and look all the way down to the north, all the best way by the northern wall — you may see the second Historic Chest there.
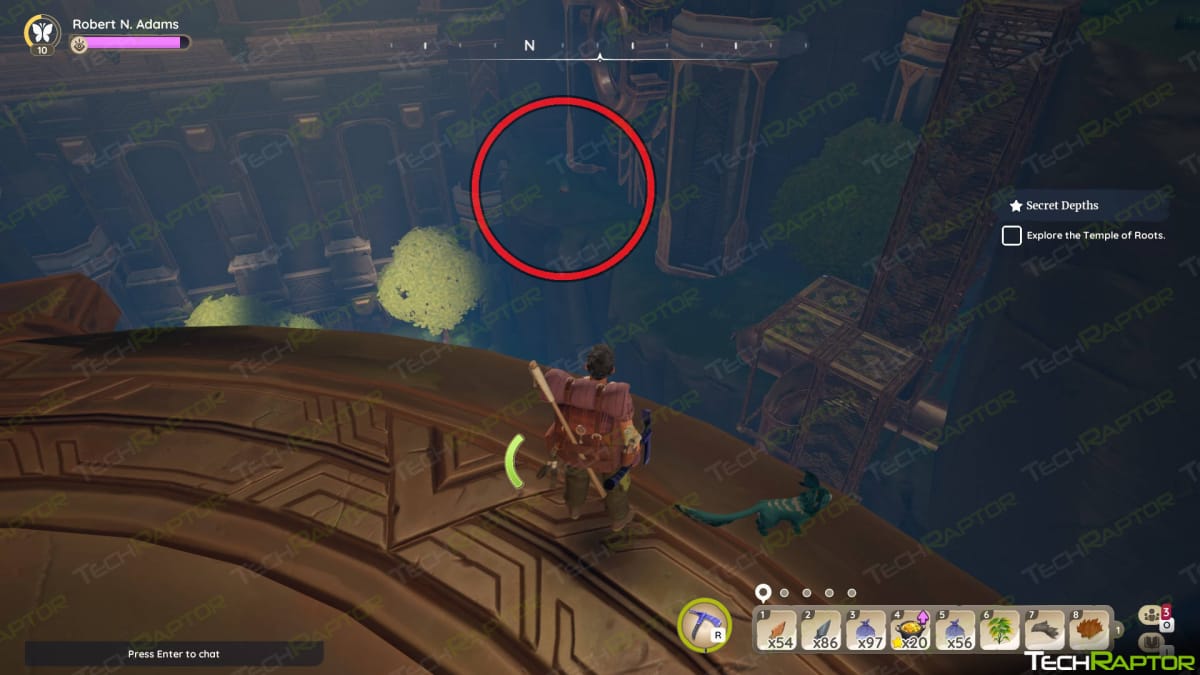
Glide all the way down to this location and accumulate the Historic Chest.
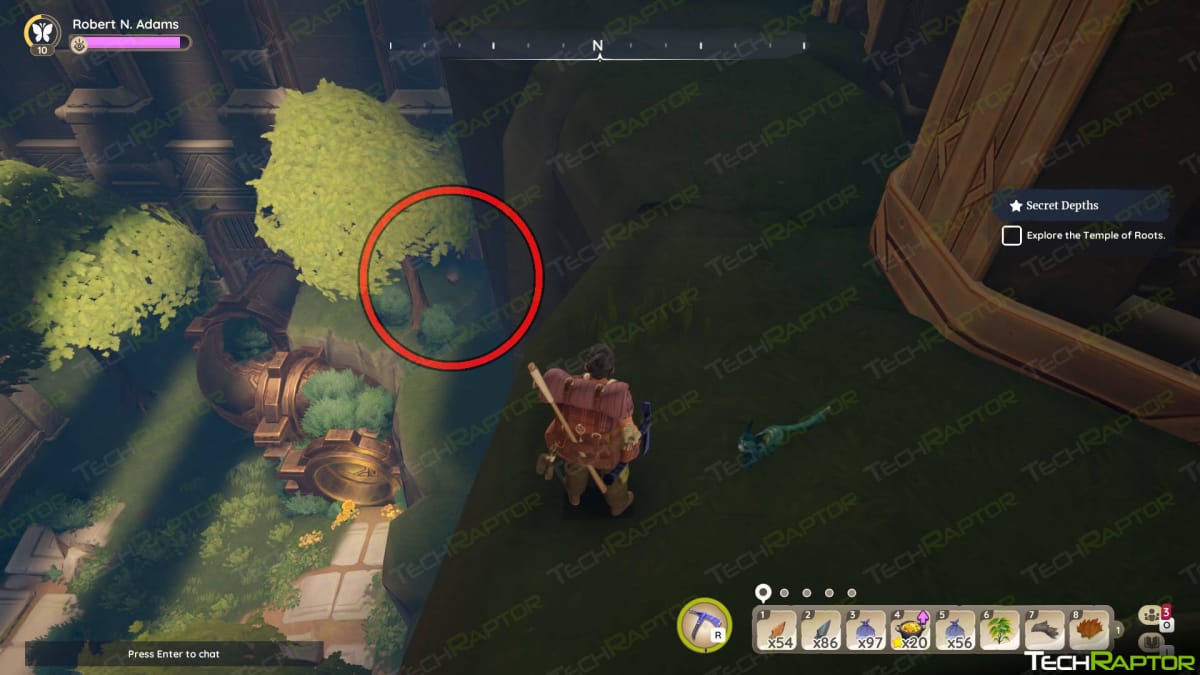
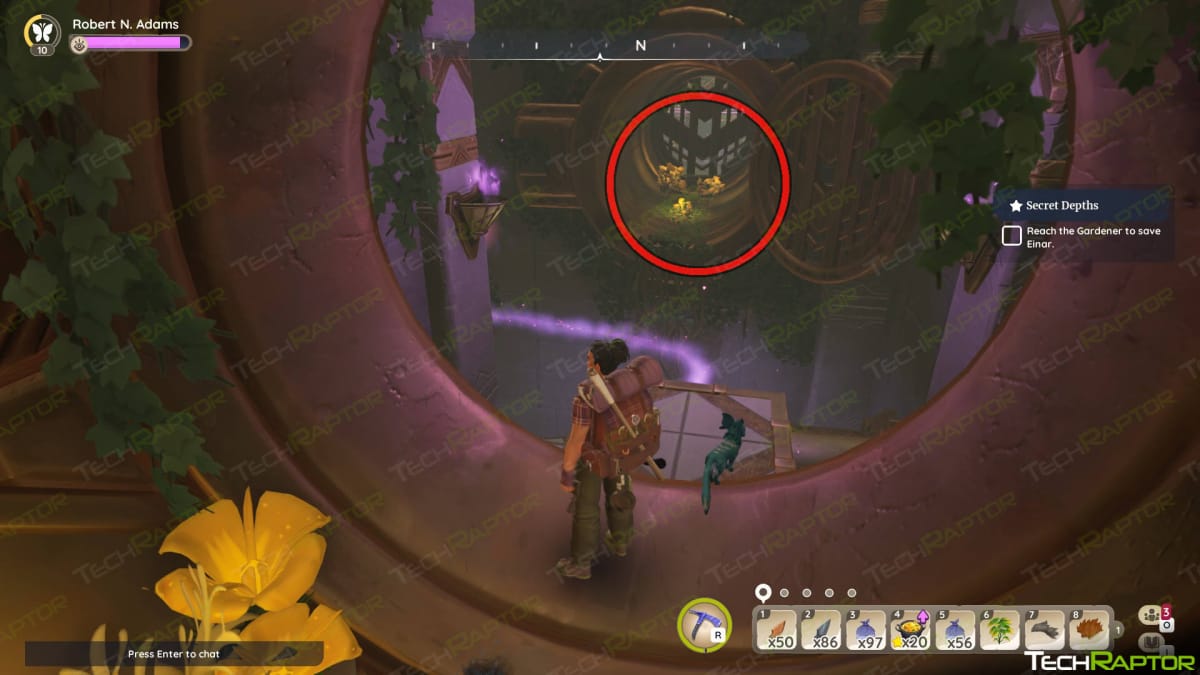
From right here, look down and to the north once more — you may see the third Historic Chest subsequent to a tree.
Now that that is accomplished, drop all the way down to the ground and go to the white ring with a bunch of Flowstone Gates. Activate the central Flowstone Gate and it’ll open up a path again to the highest. Hekla and Einhart will each stroll via the Flowstone Gate and be a part of you on the backside.
Subsequent, search for an open golden pipe on the bottom degree. Head into it and you may make your method into the second room.
The Transferring Platform
First issues first: if you exit the pipe resulting in the second room, instantly look to your proper — you may see one other pipe with an Historic Chest within it.
After you’ve got grabbed it, stroll additional forward and you may see a transferring platform over a spot.
Earlier than you attempt to cross the platform, drop into the hole; one other Historic Chest could be discovered close to the southeastern wall.

Climb again up and use the transferring platforms to cross the hole. Proceed strolling ahead and the subsequent Flowstone Gate will mechanically open.
As soon as once more, Hekla and Einar will observe you. You may be in entrance of a closed door. This time, there is a galdur head just like those you discovered within the Human Overseer Stations — that is The Gardener. Stroll as much as the pinnacle and communicate to it.
Sadly, The Gardener is programmed to make sure that all Galdur (the enormous pleasant mechs like Einar and Hekla) solely observe their “Oneness” — their singular designated goal. Einar’s friendship with you and others on the town is a violation of this oneness, so The Gardener initiates a process to do a manufacturing facility reset on Einar and erase his character.
You possibly can’t persuade him to cease it doesn’t matter what you do, and now you’ve got a mission past exploring the temple: you might want to cease The Gardener so it can save you Einar from being completely erased.
The Two Buttons
The fourth room consists of a bunch of transferring platforms and two buttons — your fast purpose is to achieve these two buttons and activate them.
Make your method throughout the platforms and hit the buttons. Should you fall down under, you may respawn again on a secure platform like traditional.
The door will open after you’ve got pushed each buttons. Stroll via it, then break the following wall together with your Pickaxe.
The Laser Platform
The subsequent room has one other transferring platform going round a curve. What you may’t see out of your place is that there’s a laser beam across the nook, and hitting it’s going to knock you again to the beginning.
Earlier than you attempt to conquer this problem, you are going to need to go into the pipe on the alternative aspect of the hole — there’s one other Historic Chest in there to gather.
Seize the Historic Chest, then drop down into the pit and climb again up. Hop on the platform, and prepare to leap over the laser.
Leaping over the laser is just a matter of fine timing. Bounce too early or too late and you will get hit by the laser. Should you do get hit, don’t be concerned an excessive amount of — you may respawn a brief distance away and you may strive once more.
You may have one other wall to interrupt together with your Pickaxe and one other Flowstone Gate to activate after you get previous the laser. Head into it — we’re nearly accomplished!
The Transportation Room
The subsequent room is clearly some type of transportation room; it has a bunch of gondolas transferring round carrying damaged (or half-finished) galdur.
There isn’t any particular technique to be discovered right here — all you might want to do is make your method via to the subsequent room.
Confronting The Gardener
The ultimate room will lead you to a console with a sequence of buttons — that is the management station for The Gardener. Communicate with Hekla; she suggests that you just begin pushing random buttons.
Push a button. It will not do something, so discuss to Hekla once more. After that, you’ll discuss with The Gardener.
You will have a bunch of dialogue decisions which you could make, however there aren’t actually any “fallacious solutions” so far as I may inform. On the finish of your dialog, you’ll persuade The Gardener to revive Einar.
Leaving The Temple of the Roots — Virtually
With Einar saved, now you can depart the Temple of the Roots. Head via the Flowstone Gate to get again to the hub, then head via the central Flowstone Gate on the Hub to get again to the floor.
Though… would not it seem to be we would have missed one thing? Yep, we nonetheless have an exquisite sliding tile puzzle to beat. Communicate with each Hekla and Einar they usually’ll helpfully let you know that the sliding tile puzzle was within the entrance lobby the entire time.
Temple of the Roots Sliding Tile Puzzle Resolution
It is time for one more sliding tile puzzle! hooray…
As all the time, it is potential to determine it out by yourself if you know the way to resolve these sorts of puzzles. Should you’re caught (otherwise you’re simply searching for a shortcut), here is the answer:
Up
Up
Proper
Proper
Down
Left
Left
Down
Down
Proper
Up
Left
Up
Proper
Down
Proper
Up
Left
Down
Down
Left
And there we’ve it! this ultimate step has accomplished the Temple of the Roots and opened up one more Bundle at Night time Sky Temple in Kilima Bay.
Subsequent Steps
With the Temple of the Roots accomplished, you’ve got reached the top of the present storyline. There’s not rather more to do for now, however you may put together for the subsequent replace by finishing different quests.
It appears that you’ll must work with The Order in an effort to progress to the subsequent a part of the story when Palia is up to date once more. If you have not but unlocked Subira, you may need to just be sure you get that accomplished earlier than the subsequent replace drops!
We have reached the top of our information on the Palia Secret Depths Quest — be sure to take a look at our different Palia guides under!